 Route Editor

| Guide | ♦ | 64 Triplogs | 5 Topics |
details | drive | no permit | forecast | 🔥 route |
stats |
photos | triplogs | topics | location |
| 642 | 64 | 5 |
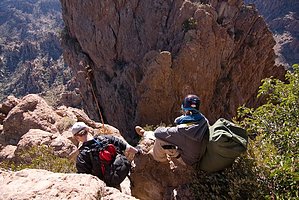
Tired of just looking at it! by Fritzski  This classic adventure takes you to the top of one of the most famous landmarks of the Superstition Mountains. The majestic Weavers Needle spire tops out at 4553' and dominates the skyline for miles around. Although this climb has been done non-technically, it is recommended that it be done as a technical climb with the proper equipment and at least one experienced climber in the group since some moves have been rated as high as 5.6. All climbers should have basic rope and rappelling experience. There are two common approaches to the Needle. Although both converge on the evident notch between the smaller south spire and the main north spire, they come in from opposite directions. The eastern approach is considered the least technically difficult of the two, but the longer hiking distance and off-trail portions would be more time-consuming (see "Weavers - Base of the Needle" in TrailDex for directions). This description will cover the "western" approach from Peralta Trail. For the initial description of the hike from the Peralta Trailhead to Pinon Camp, see Peralta Trail or "Weavers Needle Loop" in TrailDex. This classic adventure takes you to the top of one of the most famous landmarks of the Superstition Mountains. The majestic Weavers Needle spire tops out at 4553' and dominates the skyline for miles around. Although this climb has been done non-technically, it is recommended that it be done as a technical climb with the proper equipment and at least one experienced climber in the group since some moves have been rated as high as 5.6. All climbers should have basic rope and rappelling experience. There are two common approaches to the Needle. Although both converge on the evident notch between the smaller south spire and the main north spire, they come in from opposite directions. The eastern approach is considered the least technically difficult of the two, but the longer hiking distance and off-trail portions would be more time-consuming (see "Weavers - Base of the Needle" in TrailDex for directions). This description will cover the "western" approach from Peralta Trail. For the initial description of the hike from the Peralta Trailhead to Pinon Camp, see Peralta Trail or "Weavers Needle Loop" in TrailDex.The first challenge will be to find the "use" trail going up the 45-degree scree and boulder slope to the notch. It is fairly straightforward. Just past Pinion Camp, look for the first ramp-like terrain just north(left) of the distinct ravine on its right. It's the first spot that offers a straight shot up the slope to the notch at about 90 degrees to Peralta Trail. There may or may not be cairns marking the departure point, but the only slight bushwhacking you may encounter would be finding a good spot to cross the wash immediately to your right before commencing your climb. As with most climbs of this type, the biggest challenge is just negotiating the treacherous scree slope to the base of the rock. It is a bit of a hump with heavy packs, but the trail is quite evident and well marked with cairns, so take just your time and be careful on the loose stuff.
Four pitches comprise this climb. Although some may want to technically protect all four, we found it necessary only on the second. The first pitch begins up the slot and involves some low angle, low exposure climbing to a small ledge where the chimney begins to narrow and steepen. Set up a belay for the second pitch here. The second pitch involves some Class5 climbing up the narrow chimney to the large boulder or "chockstone" wedged in at the top above you. As you start the climb you will encounter a pipe hammered into the rock at about 10' up which you can sling for your first piece of protection. From here the chimney gradually continues to close and steepen with great handholds and ample spots for protection (I used two medium stoppers and a tricam). As you approach the "chockstone", you have three choices: go under it(5.0), right of it(5.2), or left of it(5.4). We chose to go to the left(4816) which takes you out on the wall to get around the boulder which made this short move the "crux" of the entire climb and the only really exposed move on the pitch. At the top of the chockstone is a large rappel anchor for the belay. You are now in the crook of the notch, and from the nice small flat area, you can see out both sides and get a view looking down on the east approach. As you begin pitch 3 the route is evident as it climbs a short 12' wall straight up the main spire to your left. The hand and footholds here, as with the entire climb are very secure - basically "bomber jugs" as they say in climber lingo. After the short wall just continue on the Class3 trail up past a couple of small trees ending at a large defined ledge overlooking the west edge. Pitch 4 consists of the final 300' up the southwest face of the summit headwall of which about the first 50' could be considered technical. This section basically hangs you out over the edge of the upper west face. Although the difficulty level of this pitch is no more than 5.1, the extreme level of exposure may psychologically affect some climbers. Once again, the hand and footholds couldn't be better and the rock affords ample opportunity to place protection if you so choose. This short, but sustained technical portion then quickly gives way to an easy Class3 trail up to the summit. At the summit you'll find the American Flag attached to a century plant stalk poked in a large pile of rocks. Beneath it is the obligatory ammo box with sign-in log and so much extraneous stuff in it its hard to get it closed. There are a couple flat camping spots surrounded by 2' security walls and a nice fire pit. The views are stupendous as you might expect, so plan on taking some time to enjoy and photograph the experience. When it's time for the descent, you'll find having a 200' rope for rappelling a godsend as opposed to tedious and nerve-racking down climbs. For the first rappel look for a large new chain anchor on the wall to your left as you approach the top of the last technical section. This will be a part free hanging down to the west ledge. From here backtrack down the trail and down climb the short 12' wall to the top of the notch (there is an anchor at the top of the short wall if you choose to rappel it). From here the next anchor is the one on the top of the boulder/chock stone and if you have a 200' rope it will just take you all the way down the chimney to the top of the first pitch where you can easily scramble back down to your gear. From here comes the most dangerous part of the hike in my opinion. Getting back down the scree slope with heavy packs is very tricky with looseness and gravity fighting against you as a team. I stepped on about a 300lb boulder which let loose and instead of hanging on for the ride I bailed right into a prickly pear which left me with a few souvenirs I was still finding a week later. Fortunately, the slope steadily lessens, and the soil firms up as you make your way down. This was a truly excellent adventure and one that I would highly recommend to anyone having the basic experience and skills to do it safely. EQUIPMENT: 60m / 200' rope helmets harnesses w/ belay/rappel device climbing shoes (recommended) medium pro, carabiners, 2' slings(2), extra 1" webbing(10') water (we packeded small hydration packs for the climb) camera w/ padded case Check out the Official Route and Triplogs. Leave No Trace and +Add a Triplog after your hike & climb trip to support this local community. | |||||||||||||||||||||||||||||||||||||||||||||||||||||||||||||||||||||||||||||||||||||||||||||||||||||||||||||||||||||||||||||||||


