 Route Editor

| Guide | ♦ | 92 Triplogs | 1 Topic |
details | drive | no permit | forecast | 🔥 route |
stats |
photos | triplogs | topic | location |
| 992 | 92 | 1 |
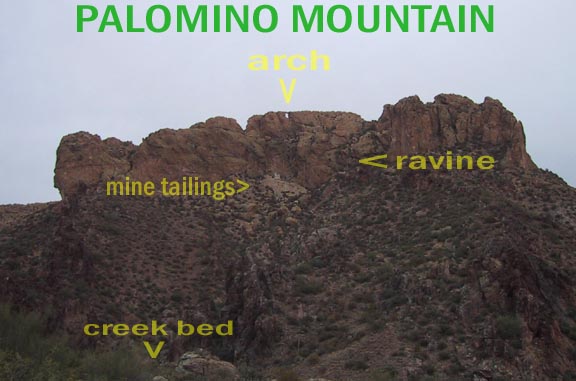
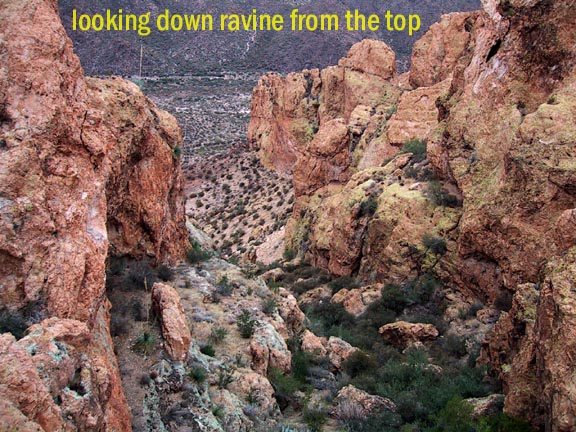
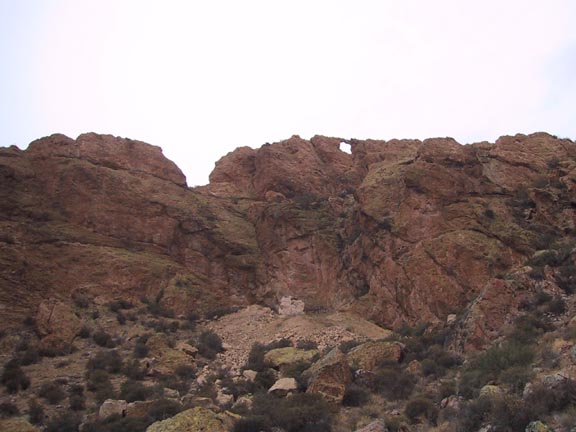
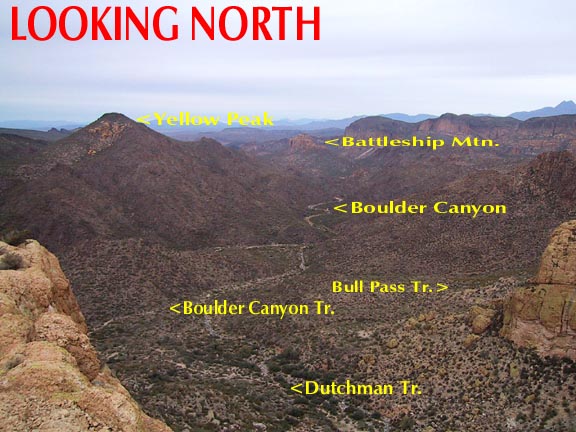
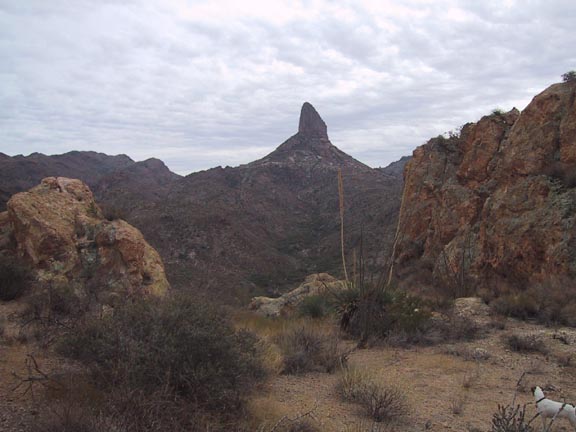
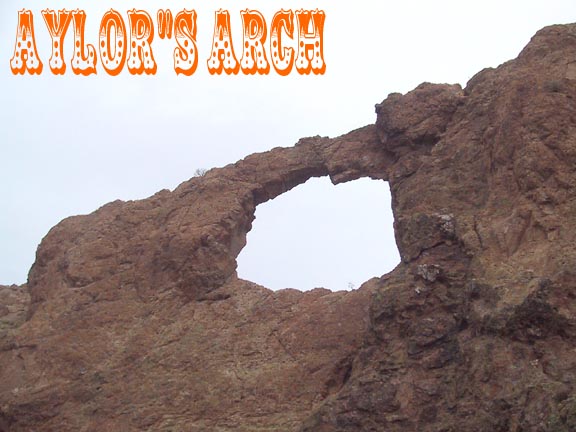
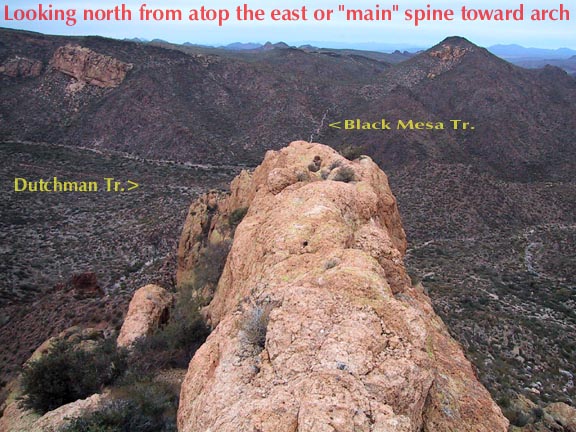
Scrambling Heights by Fritzski  Prologue PrologueThis is just the kind of hike I really enjoy - a predominately off-trail adventure into a lesser-traveled nook of the Superstition Mountains. I find this type of hike a little edgier and usually a bit more interesting than your well-established trails. Overview Aylor's Arch sits atop the mystical (some say) Palomino Mountain just west and across the Dutchman Trail from the well-known Black Top Mesa. It was named after fortune hunters Charles and Peg Aylor, who established a camp just to the north of the mountain in the 1940s. The site was later named "Caballo Camp" and is thus shown on topo map.
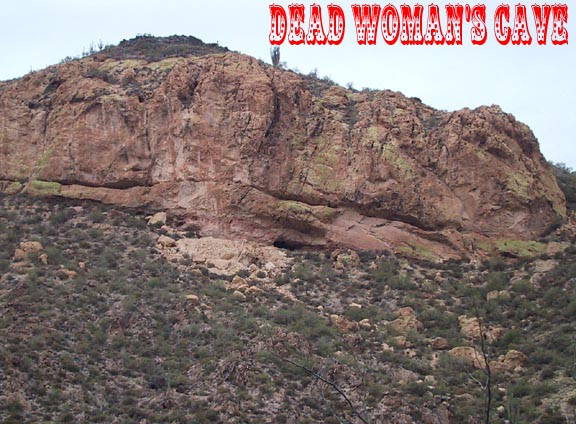
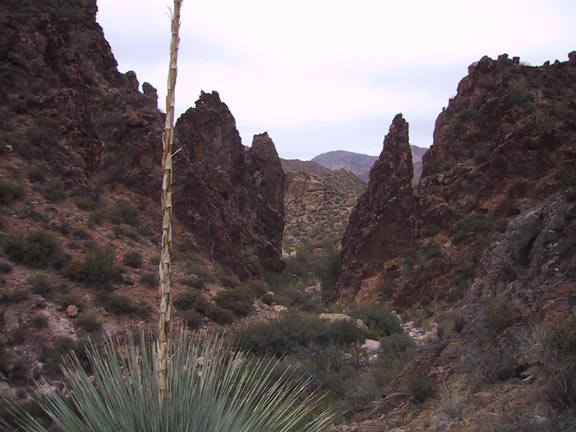
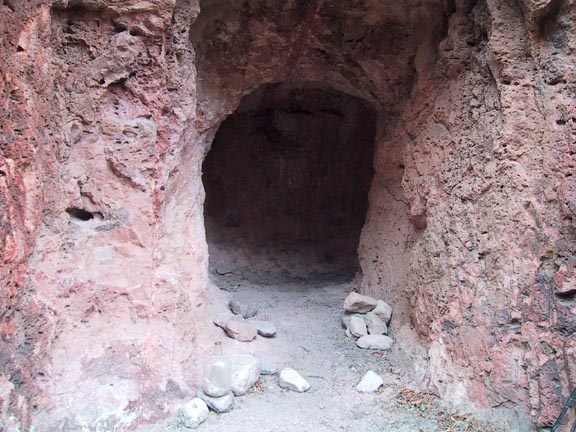
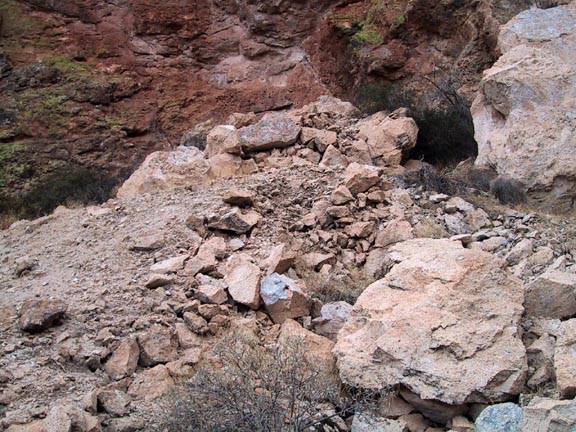
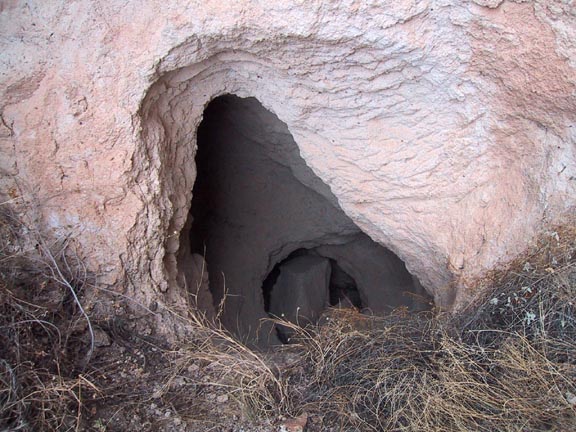
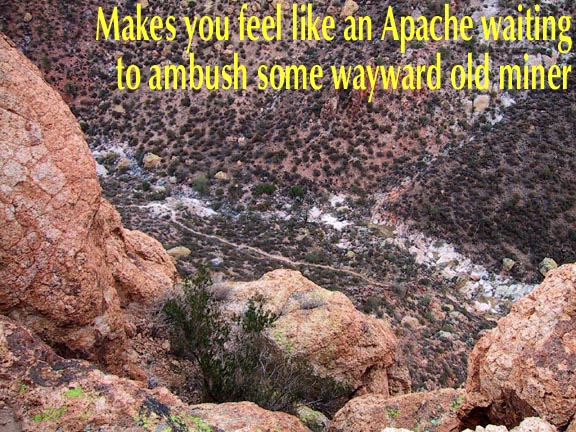
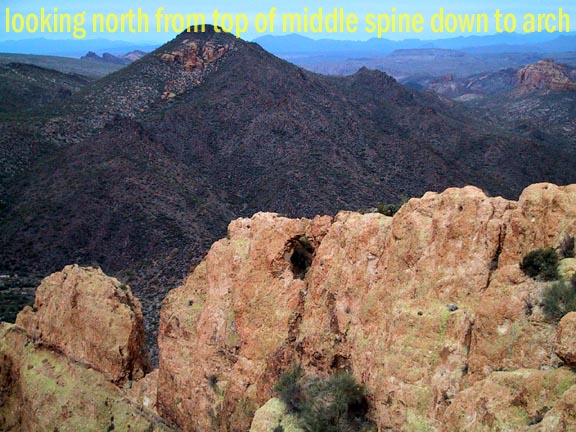
To get to Palomino Mtn. You first take the Dutchman Trail from First Water trailhead to the 3.8-mile point, which is just slightly beyond the Black Mesa Trail intersection at a small clearing with a lone scraggly tree in the middle. To help keep your bearings, the omnipresent Dead Women's Cave will be looming above you to the south on the side of Black Mesa for the duration of the hike. For a good description to this point, I recommend you reference Joe's Charlebois from First Water. Now the journey actually begins. If you look to the south, you will see a small low saddle. Make your way easily through the spread vegetation to the top and then descend into the creek bed below. Go right or south and follow the wash as it makes its way through a narrow opening in the craggy ridge ahead. The going is easy, and along the way, you will come across an old exploratory mine shaft on your right. Shortly after that, you will find yourself at the base of a narrow ravine heading toward the top of the mountain. Palomino Mountain is characterized as a rock fortress formed by sheer cliffs on all sides, except for this one opening is the only avenue of assault. While the climb up this ravine isn't the worst bushwhack in the world, there are spots where it gets a bit choked, and the angle gets steep with loose gravel. Definitely wear long pants. As you begin your ascent, you may notice a large pile of mine tailings at the base of the cliff right below the arch, which has now come into view. For this reason, I chose to favor the left side of the drainage to make my way toward it. My advice is not to bother, since it was obviously dynamited shut, there isn't much to ponder. From the amount of tailings, it would appear that it was a rather large mine, and due to its proximity to the Aylor camp, I would imagine that they must have had something to do with it. Looking around, there were other small "side" mines, but I was just convinced that the Dutchman treasure lay buried right there before me :). The top of the ravine is the narrowest, but it is fairly short, and the bushes not mainly of the more vicious types. You will finally emerge at the top and find yourself surrounded on three sides by the type of sheer vertical that gives you that uneasy little twist in your stomach when you near the edge. The top of Palomino Mtn. is formed three vertical fins or spines that run north-south. The easternmost spine is the longest and makes up the magnificent wall that looms above from the Dutchman Trail below. It is at the northern end of this fin that you will find the Arch. When you emerge from the ravine, you will be between the west and middle spines. There are convenient flat areas between each of the spines. The tricky part for some may be the scrambling and bouldering required to "hop" the spines. For those comfortable with this sort of activity, the options to explore are numerous, depending on your self-confidence. To get the best close-up view of the arch, one must get to the area between the middle and east ridge. This involves getting over the middle spine by straddling the top for a short distance till you get to a point where you can descend to the flat. From here, a little more scrambling is required to make your way north as far as possible on the flat till you are pretty much right under the arch. Being by myself, this is as close as I dared try and get. Thinking about the possibility of crossing the arch... I wouldn't recommend it. It is only about the diameter of a good-sized tree trunk, and its consistency does not look all that substantial. I went as far as I dared on top of the east spine toward the arch, but the exposure finally got the better of me. How about sitting inside the arch? Possible, but I'm ninety percent sure you would want technical rock climbing equipment to approach it from underneath. After you've thoroughly explored the top and had a good look at the arch, it's time to head down. The route is the same at the narrow top portion of the ravine, but as it begins to flare out, I took the west or left side down this time. It proved to be easier. Once I got back down to the creek bed, I decided to explore a bit further west, which was fortuitous because I discovered the secondary trail shown on the topo quad, although showing no signs of use, was quite well-defined and easy to follow. This is the topo trail (not shown on the Beartooth map) that goes right through the letter "a" in the word Canyon in Little Boulder Canyon. Where it forks, you can take either way back to the Dutchman Trail. Knowing exactly where these trails intersect the Dutchman would provide a more efficient route for future trips. Once back on the Dutchman, it is just a matter of hoofing it back to the F.W. trailhead. I enjoyed this little adventure and would totally recommend it for anyone looking for something a little different - "Off the beaten path," so to say. My only misgiving was that it was a cloudy day, and my photos were a little dull... maybe better next time! Check out the Official Route and Triplogs. Leave No Trace and +Add a Triplog after your hike to support this local community. | ||||||||||||||||||||||||||||||||||||||||||||||||||||||||||||||||||||||||||||||||||||||||||||||||||||||||||||||||||||||||||||||||||||||||||||||||||||||||||||||||||||||||||||||||||||||||||||||||||||||||||||||


