Route Editor

| Guide | ♦ | 9 Triplogs | 0 Topics |
details | drive | no permit | forecast | route |
stats |
photos | triplogs | topics | location |
| 151 | 9 | 0 |
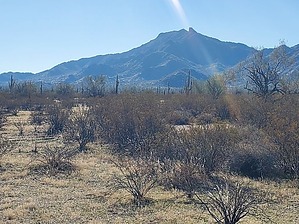
over the tracks, through the desert, and up the rocky mountain by Mike_W  Overview OverviewThe Maricopa Mountains are within the Sonoran Desert National Monument. The North Maricopa Mountains are located north of AZ Route 238, and the South Maricopa Mountains are located south of AZ Route 238. The high point in the range happens to be south of AZ Route 238, at an elevation of 3272. This hike is quite long and will likely take the full day. There are some well-graded dirt roads that lead in the direction of the mountain but these roads only go so close. To get to the summit, you'll need to do an open desert hike to get to one of the ridges and follow the ridge up. Interesting fact: The Big Horn Benchmark is about 3 air miles south/southwest from the Maricopa Mountains High Point and is about 90 feet lower in elevation.
From the parking area travel south and cross the railroad tracks. You'll also see a dirt berm past the tracks which you can cross over along with a thick grassy area. Once you cross this you will see a barbed wire fence. Look to your right and you'll see some larger trees in a wash area. In this area, you should find an opening in the fence that you could walk through. Otherwise, you could easily slide under the fence. Once past the fence, you will see a road that follows the fence. From this point you have 2 good options to get to the base of the mountain: (1) follow the road east and then south for a total of 5.5 miles, or (2) hike about 4.2 miles across the open desert. I would recommend going through the open desert on the way there because it will probably save some time. The road can be taken back just to see a different area and if it happens to be late, it will be easier and faster to make good time. While crossing the open desert, the first 2.5 to 3 miles will have a lot of creosote, some saguaros, and a lot of open space which makes it very easy to cross. There will be a few wash crossings. As you get closer to the mountain, the washes will get larger and deeper but you will be able to find some good ways to cross. You'll notice that the brush gets a bit thicker so you will need to weave through the open areas. Aim for the low saddle in the distance that is left of the high point. When you get closer to the low saddle, you will realize that you can stay to the right and get up on the ridgeline. From here, start going up the ridgeline and you will continue on this ridge until you get to the high point. On the ridgeline, there are some rocky sections that you will be able to go around, either on the left or right side. The final climb will be a bit steep but you can weave a bit. Once on top, you'll see a flat area. From here it's only a few minutes to the official high point. At the high point, there's a metal can with a registry inside. If you look to the northwest, there's another high point that looks like it's about the same height as where you are. As it turns out, it's only about 15-20 feet lower, but still worth going to. From this other high point, you can look north/northwest and see some unusual rock formations and a great photo opportunity. Head back down the way you came and when you get to the bottom of the ridgeline you will have a choice to take the road back or the open desert. If it is getting late and the sunset is coming soon, it may be better to take the road which is easier to follow but about 1.3 miles longer. If you decide to take the road back, at the bottom of the ridge, you will need to hike about 1 mile north/northeast to reach the road. Once on the road, it's about 4.5 miles to get back to the parking area. On the way back there is a Y-split in the road and it doesn't matter which way you go because those roads join back up again about 500 feet later. Check out the Official Route and Triplogs. Leave No Trace and +Add a Triplog after your hike to support this local community. | |||||||||||||||||||||||||||||||||||||||||||||||||||||||||||||||||||||||||||||||||||||||||||||||