Route Editor

| Guide | ♦ | 1 Triplog | 0 Topics |
details | drive | permit | forecast | 🔥 route |
stats |
photos | triplog | topics | location |
| 11 | 1 | 0 |
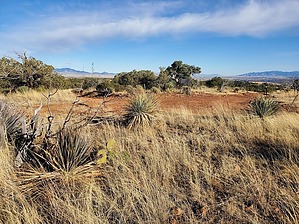
The Young Benchmark is Millions of years young! by Mike_W  Overview OverviewThe Young Benchmark is one of the many high points around Gardner canyon and is a fairly easy hike. The vertical distance from the start to the finish is about 300 feet total and the accumulated elevation gain is only about 540 feet total. There are a few ways to get to this high point. It's possible to take all road, some road with some trail, or some road, some trail, and some bushwhack. After any period of rain, some creek fording may be necessary. This guide will describe a few of the most interesting ways to reach the high point, in my opinion. Warning Some roads and trails cross Cave Creek, and other surrounding peaks in different places. Depending on the volume of water in these creeks, it may be unsafe to drive, bike, or hike across!
Start by walking about 50 feet east of the parking area and look for the entrance to the Arizona Trail on the south side of the road. It is a very good trail and a popular route for long-distance hikers. Within about 1 minute this trail will cross a creek. Depending on the time of the year, you may be able to safely walk across a series of rocks. When I did this hike in January, the creek was deep and the water was raging! The depth appeared to be about 1 or 1.5 feet and the creek was probably about 10 feet across, so I decided it was safe to wade across the cold water. Continue on the AZ Trail for roughly 0.75 miles until you reach a road junction. From here there are 2 good ways to continue, by either turning left on the road, or continuing straight on the AZ trail. Use option (a) or (b), then continue. (a) If you don't mind doing a 400-foot open country walk down a grassy hill, continue straight on the trail for another 1/4 mile, look to the south and you will see the same road that you crossed earlier. From this point, the Young BM will be south/southeast about 1/2 mile away. Walk down the hill to this road and continue west for 500 feet until you see a split in the road. Take the left branch, go down the hill and you will reach a creek crossing. (b) If you would prefer to stay on roads and trails, turn left at the road and follow it for roughly 1/2 mile until you see a split in the road. Take the left branch, go down the hill and you will reach a creek crossing. Continue here: If the creek is dry or the water flow is low, you can cross here and continue following the road (Santa Rita road) for roughly 1 mile to get to the summit. If you approach the above creek and the water is raging and deep, you can walk about 300 feet to the east along the stream and you will see a rocky area where it should be safe to cross without getting wet. Depending on the volume of water flow, it may or may not be safe. But, when I was there in January, it was safe to cross and it was possible to stay dry. After crossing the creek, you have 2 options. You can bushwhack south and east, heading up to the high point, or you can hike roughly 300 feet west to get back to the road (Santa Rita road) and continue for roughly 1 mile to get to the summit. If you decide to bushwhack, it should only be roughly 1/3 mile before you are at the top of the hill and then you should see the road again. You'll need to follow the road for about 1,000 feet to get to the official high point. At the summit, you will see the road split, and the high point is to your left. You will see at least 3 survey markers, along with a rock pile and registry at the top. On the way back, you'll have a few options on how you want to travel. Check out the Official Route and Triplog. Leave No Trace and +Add a Triplog after your hike to support this local community. | |||||||||||||||||||||||||||||||||||||||||||||||||||||||||||||||||||||||||||||||||||||||||||||||||||||